Setting Up Authentication With Shopify
To authenticate, it is recommended that the customer allows us administrative privileges as a Managed Store.
If a customer does not wish to add us, they will need to follow the procedure below, up to and including the location.
This is typically the way clients are set up on our side.
-
Log in to Shopify Partners.
The credentials are available from 1Password - Global.
The Shopify Partners page displays.
-
Click Stores on the left navigation pane.
-
On the Stores page, click Add store.
-
On the Add store page, select the Store type to be Managed store.
-
Enter the Store URL.
-
Select all Permissions.
-
Add a message for the administrator.
Message to be Name from .wms or .wms on behalf of 3PLCompany.
-
Click Save.
-
-
Wait for authorisation from the client.
Required access is orders, (including edit orders), customers, locations, manage and install apps and channels, and view apps developed by staff and collaborators.
If the client does not wish to provide us access, the following details are required.
Note: Support is limited as we cannot log in to diagnose any issues.
|
Required item |
Notes |
Where to find |
|---|---|---|
|
Shopify URL |
The store URL. For example, https://my-new-shopify-store.myshopify.com |
In the URL field after they log in. |
|
Shopify access token |
This must be a Private App set up. |
Inside Private apps. |
|
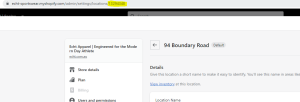
Location ID |
For the warehouse being communicated with. |
Within Settings > Locations is the end of the URL. |
If all the details are sorted, go to set up the Connector.
If details are missing, issue the next set of instructions to the customer.
Now we set up ourselves as a private app. This gets the API key that is used for transactions.
The customer will need to do these steps if they are not providing us access.
-
Log in to the store from the Partners page.
-
Click Settings on the left navigation pane.
It is the last option.
-
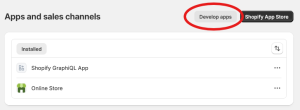
On the navigation pane of the Settings page, click Apps and sales channels.
-
Click Develop apps.
-
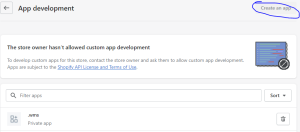
Click Create an app.
If the field is empty, the customer should enable Custom App development.
-
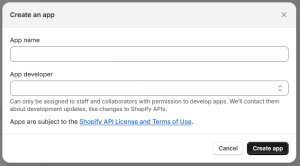
Enter the App details.
The Private app name is .wms.
The email must be assigned to a user who has permission for the store.
-
Enter permissions for the app.
-
Click the API credentials tab.
-
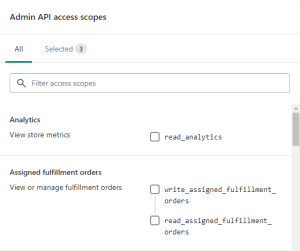
Click Configure Admin API scopes.
-
Refer to the minimum API permissions.
-
-
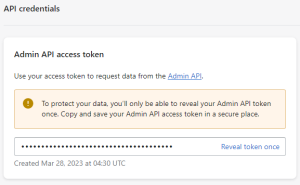
Get Shopify Access Token.
-
Once permissions are saved, click the API credentials tab again.
-
Click Install app.
-
Click Install in the pop up message.
-
Click Reveal token once.
-
Once revealed:
-
if using the Setup tool in Connection Setup - used as the Shopify Access Token input.
or
-
if manually setting the credentials, use the token in Password and make sure the Username is empty on the Credential Table in ERPGate.
-
-
-
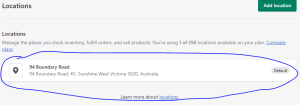
On the left navigation pane, go to Settings > Locations.
-
On the Locations page, select the relevant warehouse.
-
Get the location ID from the URL.
These are the last digits in the URL. This will be used in upstream transactions.

